I built domain-manager because I was tired of provisioning the same PHP hosting stack by hand for every new site. Create the Unix user, make the web root, wire up nginx, create the MySQL database, sort out PHP-FPM, fix permissions, enable TLS, repeat.
I didn’t need a full hosting panel with mail, DNS, dashboards, reseller features, and a pile of opinionated abstractions sitting between me and the machine. I wanted a very specific thing: a repeatable way to host multiple PHP sites on one Linux server, keep each site isolated enough to be sane, and still have the entire setup remain transparent and editable.
What I actually wanted
I wanted something closer to this:
# Create a new domain, with everything ready to go
./domain-manager add example.com

# List all of the domains
./domain-manager list

# find info and delete domains
./domain-manager info example.com
./domain-manager delete example.com

# Manage MySQL databases
./domain-manager mysql create example.com example_db_name
./domain-manager mysql list example.com --stats

# SSL
./domain-manager enable-ssl example.com --cloudflare
Under the hood, the basic idea of what I wanted was:
nginx runs on the host
MySQL runs on the host
each site gets its own PHP-FPM container through Docker or Podman
each domain gets its own Unix user
metadata about domains and databases is stored locally in a file
There’s no need to fully containerise the whole server. nginx on the host is easy to debug. MySQL on the host is easy to manage. System backups stay straightforward.
PHP is where isolation matters most for this kind of setup. Have a website that you want to limit uploads? Simple, just apply SELinux rules to the cgroup that php runs in. Or run php in a container that has only read-only access to the application.
Each domain can run its own PHP-FPM container, so different sites can use different PHP versions without turning the host into a museum of conflicting packages. That’s no need to run a tool like EasyApache to build every version of PHP that you might possibly want to support in the future.
Recently, I had the fun experience of converting a CSV file that contained the names of a bunch of cities inside Australia. The CSV file contained four columns:
City name
Latitude (in DMS)
Longitude (in DMS)
There were more than 5,000 rows in the CSV file. I wanted to pull a list of all the cities, and determine what state they were in.
Instead of using the Google Maps API (and getting charged ~$35), I decided to hunt down a way that I could use open data provided by the Australian Bureau of Statistics to add the state name to the list of cities.
The ABS has a downloadable ESRI Shapefile, which basically is a vector map of all the borders for states in Australia. This, with a little bit of data cleaning using Pandas DataPrep, and a quick dirty R script would allow me to add the state name to the CSV.
So, first we start with the raw CSV file that I was given:
Running this script would give me an output file that contained the latitude and longitude converted from DMS (Degrees, Minutes and Seconds) to decimal values – skipping the rows that could not be processed correctly, ready for the next processing step.
SZU
lat
long
lat_clean
long_clean
0
Aberfoyle
30° 21’30″S
152° 2’30″E
-30.3583
152.0417
1
Adaminaby
35° 58’30″S
148° 51’0″E
-35.9750
148.8500
2
Adelaide
34° 56’0″S
138° 35’30″E
-34.9333
138.5917
3
Adelong
35° 18’35″S
148° 1’0″E
-35.3097
148.0167
4
Agnes Water
24° 17’0″S
151° 49’0″E
-24.2833
151.8167
…
…
…
…
…
…
3092
Yumali
35° 28’0″S
139° 51’30″E
-35.4667
139.8583
3093
Yuna
28° 23’0″S
114° 54’30″E
-28.3833
114.9083
3094
Yuna East
28° 25’30″S
115° 10’0″E
-28.4250
115.1667
3095
Yunta
32° 35’0″S
139° 28’0″E
-32.5833
139.4667
3096
Zamia Creek
24° 32’30″S
149° 36’0″E
-24.5417
149.6000
Using Rlang, we import the Shapefile from the ABS, import the cleaned CSV file with decimal lat/long points, and use st_intersects from the sf package to determine what state a given city is in, based on it’s lat/long location.
My attempts to get the perfect video out of an Apple MacBook to the Dell S2721QS finally is a success! It’s all thanks to Dell. I guess it makes sense. Dell makes the monitor, so I suppose having the Dell DA310 USB-C companion adapter is the right thing to do.
That said, I did expect the Apple adapter to “just work”. I ditched it for the more capable (and gigabit network-enabled!) Dell DA310. The Apple adapter displayed blurry text and icons that really were not sharp. It had to go!
The adapter will work with both Intel and Apple Silicon arm64/M1 MacBook’s. I have tested the adapter with macOS 10.14, 10.15, 11.6 and 12.2. See the bottom of the article to see some notes on how to get the Ethernet port working correctly.
Two Apple adapters, both adapters that did not work. The Dell DA310 sits next to it.
First, to the Apple USB-C Digital AV Multiport Adapter. You need to be aware that there are two versions of these adapters. Model A1621, which supports a 4k output (3840 x 2160) at 30hertz (30 frames per second), and the Model A2119, which supports 4k video at 3840 x 2160 at 60hertz. Apple does have a support document, which explains the difference between the two adapters (pictured above, left). Needless to say, I would suggest a different adapter.
One thing to watch out for when purchasing a USB-C adapter is how they mention support for 4k resolutions. Even though an adapter might “support” 4k video, it does not mean that the adapter will deliver a perfect image. Apple mentions that their Model A1621 version of the AV Adapter does not allow screens to operate at a high refresh rate. Even the most recent current model, the A2119 does support high refresh rates – on paper – but not always with a high-quality image.
Why do I care about refresh rates?
High refresh rates allow for buttery smooth window movements. A low refresh rate will effect everything from the latency of key presses appearing on the screen, to the smoothness of the mouse cursor on the screen when physically moving the mouse. The limited 30 frames per second of the slower refresh rate afforded by Apple on their older AV Adapters (bottom left adapter, pictured above) is extremely noticeable.
Using a MacBook with a 30-hertz resolution makes the computer feel frustratinglyslow.
Luckily, updating the AV Adapter to the Model A2119 (top left adapter, pictured above) does give 4k video at 60 fps. That said, the quality of the output on the A2119 at a high refresh rate is sad. The colours appear washed out. It almost seems as though the images data is heavily compressed. It’s either done by the MacBook or the USB-C adapter before the data is sent to the display.
Dell S2721QS, shown at 60 hertz with an Apple adapter
Dell S2721QS, shown at 60 hertz with a Dell adapter
It’s hard to be able to visualize the difference between them both side by side. You will notice that lines, such as the diagonal lines on the IntelliJ IDEA icon appear jagged. Switching between the two though, the difference is immeasurable.
Side by Side: Apple A2119 vs Dell DA310
I’m not sure what exactly is causing this issue. Looking inside System Information, the resolution, refresh rate, connection type settings, and frame buffer depth were all the same.
Dell is notorious for not really supporting Apple’s operating system very well. It’s not just their monitors, but other accessories like their USB-C docks.
It’s a shame. I think that Dell has pretty high quality gear.
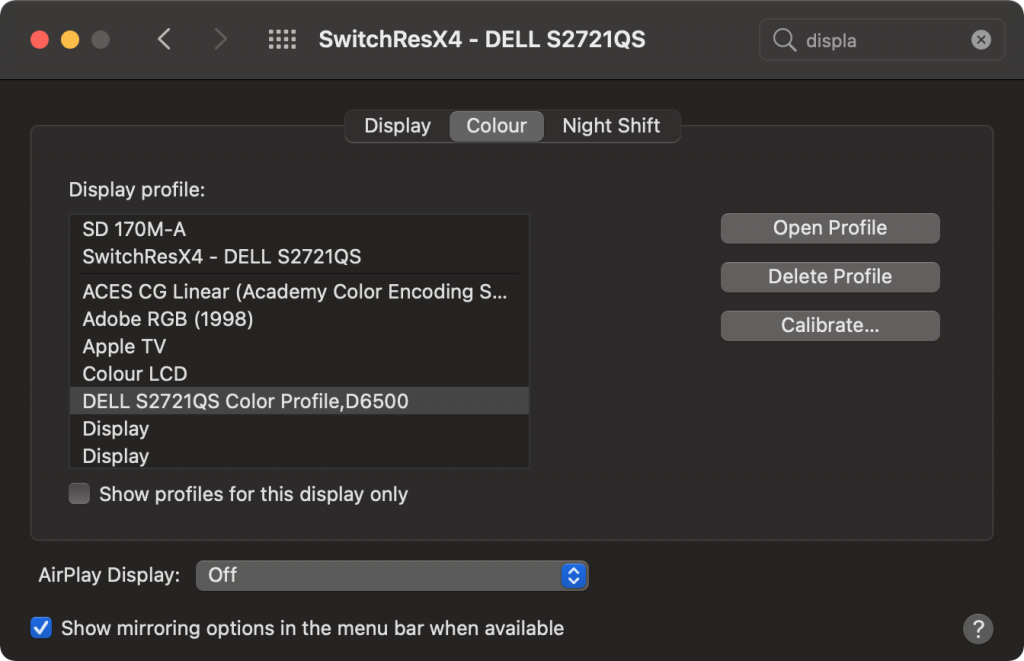
I recently acquired a Dell S2721QS, and wanted to extract the files that are provided in their Windows driver to determine what exactly what was in there. After a quick look, it turns out, not that much. That being said, the ICC/ICM file provided with the driver pack may be useful for use on macOS.
Either way, I recently wanted to install the colour profiles that come with Dell monitors (or can be downloaded from the Dell website) on my Mac, but could not find an easy way to extract the ICC/ICM files and install them.
Starting with the downloaded file, DELL_S2721QS-MONITOR_A00-00_DRVR_KTRRG.exe I extracted the file using Binwalk.
Simply replace the strings in the first INSERT query that are wrapped around square brackets, and run the SQL statement on your server. You will then be able to successfully log into WordPress.
INSERT INTO `wp_users` (
    `user_login`, `user_pass`, `user_nicename`, `user_email`,
    `user_url`, `user_registered`, `user_activation_key`,
    `user_status`, `display_name`
) VALUES (
    '[username]', MD5('[password]'), '[username]', '[email-address]',
    '', NOW(), '', 0, '[username]'
);

--
-- Make MySQL remember the ID for the user just inserted for use later
--
SET @MY_USER_ID = LAST_INSERT_ID();

--
-- Add the magic sauce to have WordPress know the user is an admin...
--
INSERT INTO `wp_usermeta` (`user_id`, `meta_key`, `meta_value`) VALUES
(
        @MY_USER_ID, 'wp_capabilities',
        'a:2:{s:13:"administrator";s:1:"1";s:14:"backwpup_admin";b:1;}'
),
(@MY_USER_ID, 'wp_user_level', '10'),
(@MY_USER_ID, 'wp_dashboard_quick_press_last_post_id', '620'),
(@MY_USER_ID, 'wp_user-settings', 'editor=tinymce&uploader=1&hidetb=1'),
(@MY_USER_ID, 'wp_user-settings-time', UNIX_TIMESTAMP());
With updates going on in the last couple of months for various packages, such as OpenSSL and GLibC which have fixed a number of important security vulnerabilities, I thought I might share a one liner that might save you one day.
Running lsof will list all of the currently opened files from processes running on your system. -n will stop lsof from resolving hostnames for processes that have opened network ports to different processes (such as your webserver, mail server etc)
Running grep a couple of times will ensure that we find all the processes that have loaded a shared binary that has been deleted.
Note that the “init” process has been excluded. This is done on purpose. init can not be restarted without rebooting or otherwise killing the system.
The sed magic will show a list of all the processes and their PID’s, along with the library that was deleted that triggered it being listed as an application that should be restarted.
I promised myself never to release Laravel until I had great documentation, and I never release a new version until the documentation is totally up to date. Any PHP programmer can pick up Laravel and start using it in a matter of minutes. The expressiveness of the code itself and the great documentation truly make coding enjoyable.
It seems that Google has been on a relentless campaign to get Google+ to work. From only allowing YouTube users to comment with a Google+ account to their desperate attempts to integrate it into Google’s own search results (which seem to be all but gone now…) it all seems to be very pointless on Google’s behalf.
Their problems have been two sided. Firstly, they have battled the massive loss of data that has happened thanks to Facebook now having much of the information that was once the forte of GMail (although they still do have YouTube) but on their own side, it seems that Google have still not really wanted to side with people trying to integrate with their own social platform.
With Facebook and Twitter, it is extremely simple to get external applications to post to the respective accounts. Seriously, you can get an API account set up literally in three minutes, and information posted on either of the respective streams within another 20 minutes.
Despite the fact that Google has released this functionality to a select group of partners (of which only HootSuite comes to mind…), Google after more then three years seems to feel that this functionality should be all but unavailable.
Issue #43 has been around in Google+’s platform issue tracker since September 2011 and to this day there have been nothing but excuses.
More then 400 developers ask Google for a feature inside their API, and the best that Google can come up with is that their API needs to be perfect before they release it.
People have their hopes on write access to Google+ being a well kept secret that is to be revealed at Google I/O this year, but I am unsure about that.
I don’t get what is the deal? Why does Google have a social platform that still has no documentation for writing to the Google+ streams? You look at all of the major social platforms like Twitter and Facebook and there is much growth that can be attributed to having an API.
Google’s mission is “[…] to organize the world’s information and make it universally accessible and useful”. Here are developers that are hanging to give you (Google) information. Google: please get this; we want to be able to feed you data, and your not allowing is to put it into your hands.
With Facebook dropping it’s organic reach, it’s no longer useful to disseminate information on that platform, as the cost to benefit ratio is deteriorating as Facebook tries to get us to pay more to get the organic reach of days gone past.
Google’s inability to listen to clients wants (and somewhat arguably, their needs) have been their downfall.
They had their chance with a nice simple interface and the ability to comfortably share long form texts to be the replacement for blogs. Now all Google+ feels like a really noisy version of medium.com.
These days, all I use Google+ for is to complain about the fact that I can’t post to Google+ using software, and instead must use their web interface. As someone who wants to post Google+ content for five different content brands with one or two pieces of original content per brand with twelve different writers, this is almost impossible. I don’t want to hand out these login details to my writers, they should be able to share the content from within their content management platform.
But really, this ranting is all in vain. I already quit Google+ for my brands last month. I asked Google for these features, they never came.
No difference was ever felt. Even with Facebook’s decreased organic reach, one brand that has more followers on Facebook receives a higher click through rate for content then a Google+ page with more followers.
Last week I spoke at SydPHP, which was hilariously horrible due to my lack of public speaking skills.
During my Introduction to Laravel & Composer there was a very interesting question posted asking about an issue that he came across while developing a cron that was running on his server.
The process was set to be started every minute to go and process some data. The problem was he didn’t know how long it would take for the data to processed. Sometimes it could take five seconds, other times it could take five days.
To try and solve the problem, the process would attempt to block the PHP process by running by using the sem_acquire function. This worked. That is, until the same process was launched multiple times and the request to acquire a semaphore would ultimately fail.
So, the first part of the problem is that semaphores like everything else to do with a computer have a limit to them. Semaphores are different to other methods of locking because they main purpose for existing is to control access to data when developing software that will be needing to access data from multiple threads (i.e., parallel programming).
Viewing semaphore limits can be done by the ipcs command, which is provided by the util-linux-ng package in RHEL and Arch Linux.
root@staging [~]# ipcs -ls

------ Semaphore Limits --------
max number of arrays = 128
max semaphores per array = 250
max semaphores system wide = 32000
max ops per semop call = 32
semaphore max value = 32767
A call to sem_get will add one extra array into the kernel if the key has not already been used, which is fine, but the important part is that at least on RHEL, there is a limit of 250 semaphores per array. This means that after the 251th attempt, sem_acquire will fail to get a semaphore.
There is no simple way to fix this. There is essentially two options. Either the maximum number of semaphores created is increased, or you create less semaphores. You don’t really want to add more semaphores though, and the number of arrays set by default is actually a very forgiving number.
If you wanted to see what the kernel’s current settings for semaphores are without using ipcs, you could use find the information from /proc/sys/kernel/sem.
Well, not exactly. Semaphores are amazing for the purpose they were built for, that is, preventing processes from accessing a resources while another process is performing operations on it. However, if you are not going to need access to the resources straight away, then you don’t want to use a semaphores, and the reasons are plentiful.
Files are awesome when it comes to locking two processes from running at the same time. It’s not just me who thinks that, too!
RPM uses files to lock the application. When you attempt to install two packages from two processes at one time, the process that is launched the second time will fail, thanks to the first application creating a file saying that RPM is locked.
flock is more portable than sem_get. (Semaphores don’t work on Windows, files however do work on Windows. With caveats.).
Here is a simple lock class that I wrote. It will check if a file exists, if it doesn’t, it will be created.
<?php

class ProcessLock {

    private $lockFilePath = '/tmp/tim.lock';

    function aquire() {
        if (file_exists($this->lockFilePath))
            return false;

        // Get the PID and place into the file...
        $pid = getmypid();

        // Hopefully our write is atomic.
        @file_put_contents($this->lockFilePath, $pid);

        if (!file_exists($this->lockFilePath))
            return false; // our file magically disapeared?

        $contents = file_get_contents($this->lockFilePath);

        $lockedPID = (int)$contents
        if ($pid === $lockedPID)
            throw new Exception("Another process locked before us for somehow");

        return false;
    }

    function release() {
        @unlink($this->lockFilePath);
        return true;
    }
}
To use this class, we simply create a new instance, and attempt to acquire the lock. If successful, then we run our code.
$myLock = new ProcessLock();

$gotLock = $myLock->aquire();

if ($gotLock) {
    // ... this is where I put all of my code that only
    // one process should run at a time

    // Then we release
    $myLock->release();
} else {
    echo "Can't run, sorry";
    exit(2);
}
When the lock has been acquired, you might get bonus points if you check if the process is still running or if the lock is actually stale. This can be done by checking if /proc/$lockedPID exists, and if it does, if /proc/$lockedPID/exe is still symlinked (using readlink) to PHP_BINARY (though this will only work on Linux).